How to Make Great Grandma’s Homemade Cinnamon Rolls With Yeast
Learning how to make Great Grandma’s homemade cinnamon rolls with yeast will become one of your new favorite things. They are amazingly delicious!

Made From Scratch Cinnamon Rolls Using Yeast
Ingredients
Equipment
Method
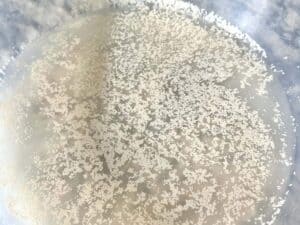
- Combine 2 cups of warm water (no more than 110°) and 1 pkg. of rapid rise yeast. Let the yeast dissolve for about a minute and then gently stir around until fully dissolved.
- Sprinkle in 1 tsp. salt and swirl around.
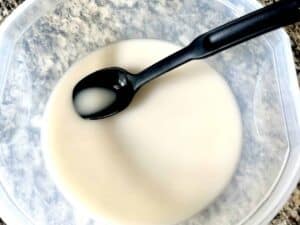
- Add ½ cup granulated sugar and ⅓ cup oil. Gently mix in by swirling the spoon around in the mixture.

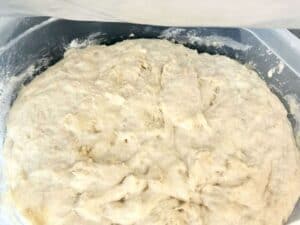
- Stir in 4½ cup bread flour. Do not over mix. Dough will be stringy.
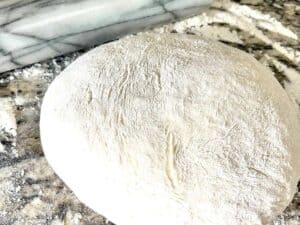
- Cover the bowl with wax paper and then let it rise for 2-3 hours.
- After the dough has risen to the top of the bowl or doubled, gently take the wax paper off of the top.
- Sprinkle plenty of flour on the surface you are going to knead the dough on and gently pour the dough out of the bowl and onto the counter.
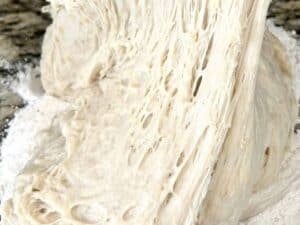
- Sprinkle more flour on top of the dough and begin the kneading process.
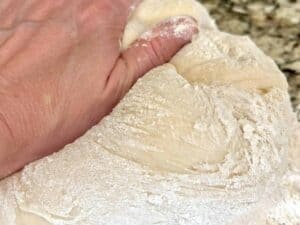
- Knead dough for around 10 minutes. The dough will let you know when it is done. Turn, fold, and press. Repeat process.
- Sprinkle on additional flour when the dough starts to tear or when you feel sticky dough.
- Flip dough over and let it rest for 10-20 minutes.
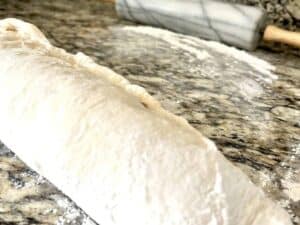
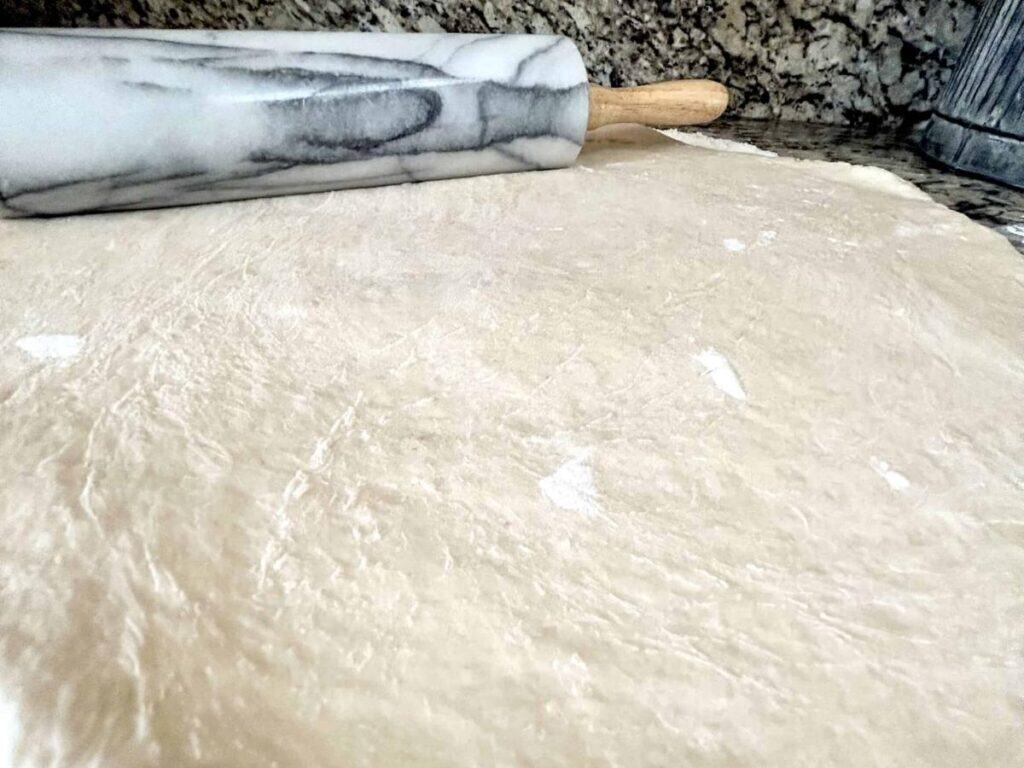
- Roll dough out into a large rectangular shape using a rolling pin.

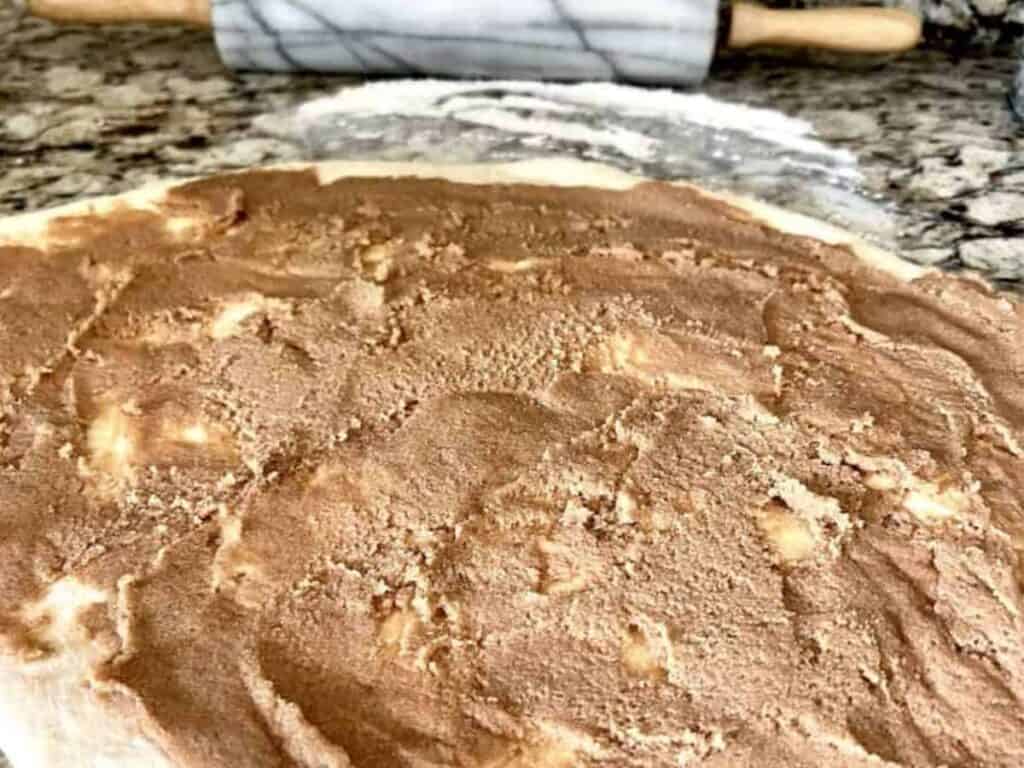
- Mix together softened butter, brown sugar, and cinnamon.

- Spread mixture over rolled out dough.

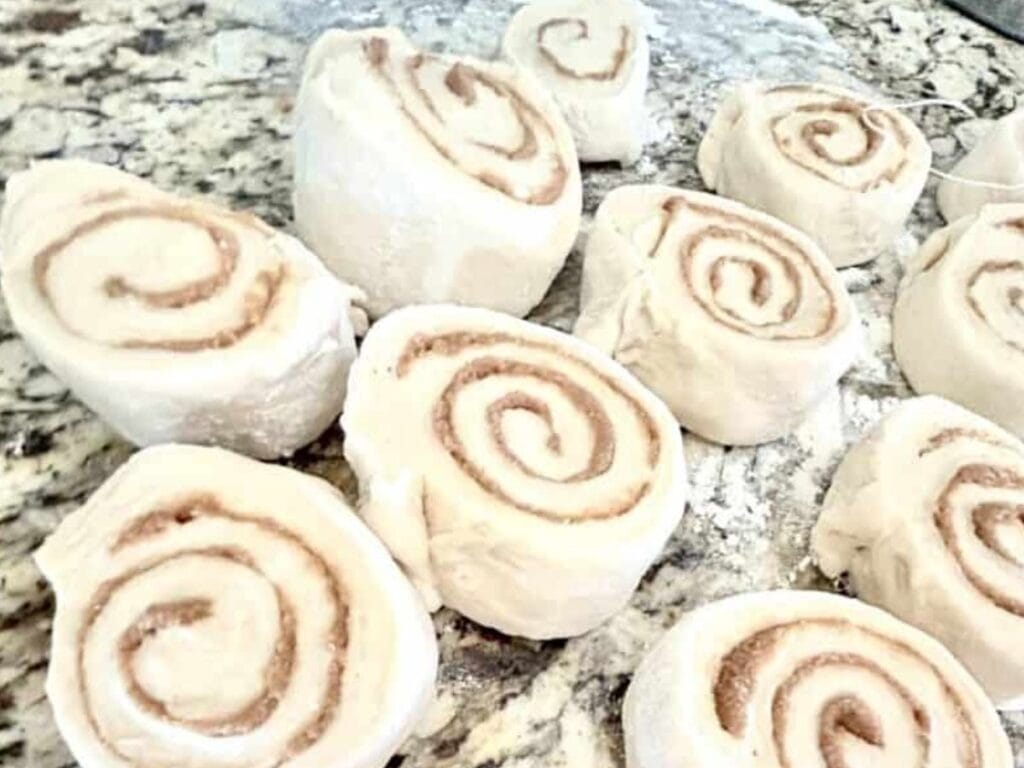
- Roll up dough into a long tube.
- Use dental floss or a large sharp knife to cut individual rolls.
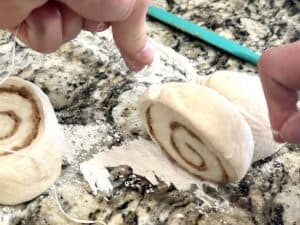
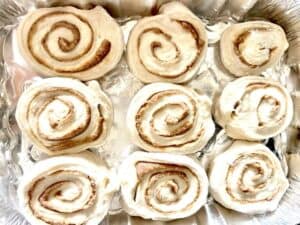
- Put rolls in a 9 x 13 pan. You should be able to do three rows of three. You may have enough rolls to fill an 8 x 8 pan as well.
- Cover them with wax paper and let them rise for another one to two hours.
- **If you are baking them in the morning, cover the pan with foil, and put it in the fridge as soon as you add them to the pan. They do not need to rise on the counter as they will rise in the fridge overnight.**
- Remove the wax paper and bake in a preheated 350° oven for 25 minutes.
Let me tell you—these homemade cinnamon rolls are the real deal. This recipe has been passed down from my great grandma, and every time I make them, the whole house smells like love and sugar. If you’ve never made cinnamon roll dough with yeast, don’t worry. I’ll walk you through it like we’re baking together in my kitchen.
The Famous Cinnamon Rolls Everyone Talks About
This recipe has been in our family for a very long time and it has only improved with the invention of rapid rise yeast and conversations at family reunions where different tips and tricks are shared and talked about. It starts with a basic yeast roll recipe that you can read more about here in my blog.

Traditional Made From Scratch Cinnamon Rolls Using Yeast
Cinnamon rolls are a real treat! They are soft, rich, and addicting. You can enjoy them for breakfast, lunch, dinner, or as a dessert.
It will take practice, but learning how to make them will connect you with the past in a way that is rewarding beyond words. There is no hurry to this recipe and it is an art that you can really learn to enjoy.
Start with the Yeast Mixture
Use warm water—not too hot
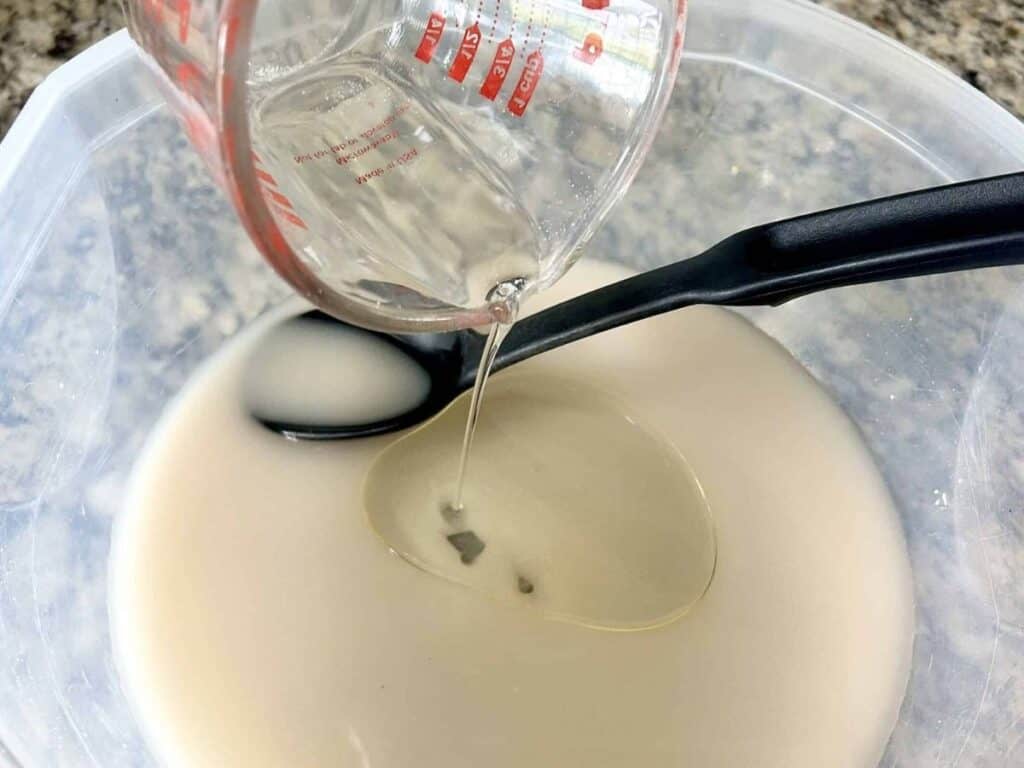
Pour 2 cups of warm water into a large bowl. The water should be no more than 110°F. Add one packet of rapid rise yeast (you can also use active dry yeast, but it may need a few extra minutes to activate). Let the yeast sit for a minute. Then give it a gentle stir with a wooden spoon until dissolved.
Add the Rest of the Wet Ingredients
Think medium speed if using a dough hook, gentle mixing here.
Sprinkle in 1 teaspoon of salt. Swirl it around to mix. Now stir in ½ cup of granulated sugar and ⅓ cup of vegetable oil. Mix gently—no need to turn on your mixer here. Just stir until everything looks smooth and blended.
Time for the Dry Ingredients
Bread flour or all-purpose flour makes the magic happen.
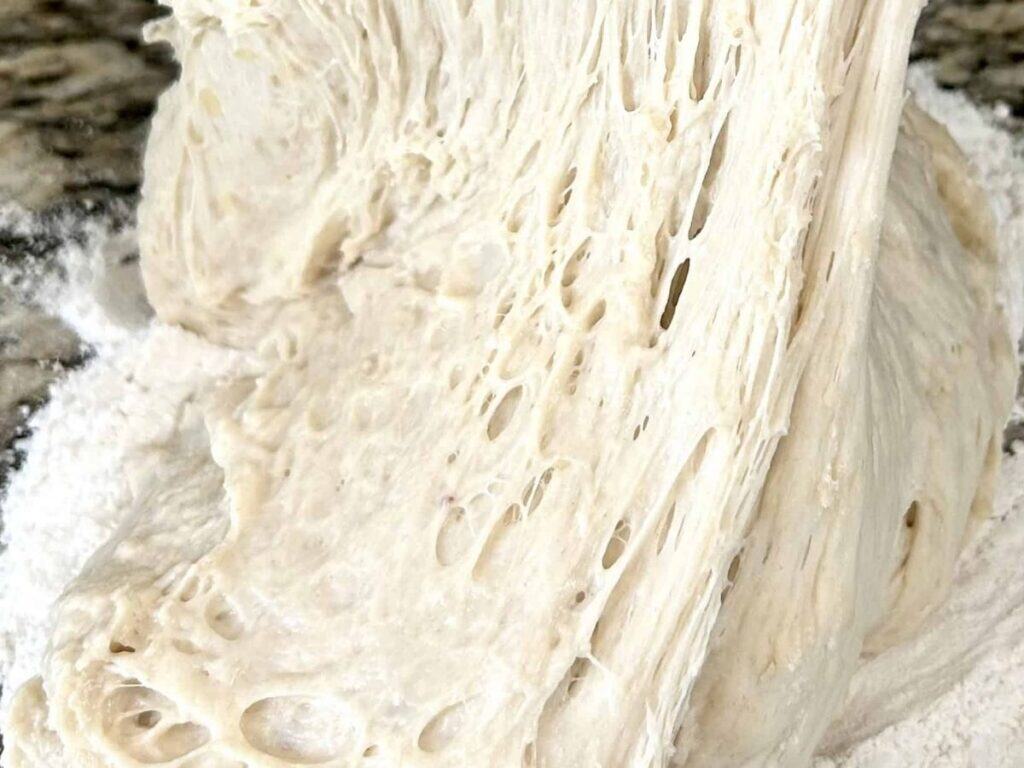
Measure out 4½ cups of bread flour. Slowly stir it into your wet mix using a spoon or paddle attachment on low speed if you’re using a mixer. Don’t overmix. The dough will look stringy. That’s okay. Cover the bowl with plastic wrap or wax paper and let the dough rise in a warm place for 2–3 hours.
Putting it in a warm spot will help to speed up the process.
Knead That Cinnamon Roll Dough
This is where the love happens.
After the dough has doubled, take off the wax paper. Dust your counter with much flour. Pour the dough out of the bowl and sprinkle more flour on top. Now start kneading.
Turn. Fold. Press. Repeat. Do this for about 10 minutes. Add flour if the dough feels sticky or starts to tear. When it feels smooth and elastic, you’re done. Let the dough rest for 10–20 minutes.
Roll It Out with a Rolling Pin
Big rectangle = more cinnamon filling
On a lightly floured surface, use a rolling pin to roll the dough into a big rectangle. Not too thin. About ¼ inch thick is perfect.
Mix the Cinnamon Filling
Brown sugar makes it special
In a small bowl, mix:
• 1 stick softened butter
• 1½ cups brown sugar
• 1½ teaspoons cinnamon
Spread that buttery cinnamon goodness all over your rectangle of dough.
Time to Roll and Slice
Roll the long side and grab dental floss
Start on the long side and roll the dough up into a tube. Tight but not squished. Use dental floss (or a sharp knife) to slice the roll into 1 to 1½ inch pieces. Place the rolls in a 9×13 pan. You’ll get three rows of three. You might even have enough for an 8×8 pan too.
Let the Rolls Rise Again
They need one more cozy nap.
Cover the pans with plastic wrap or wax paper. Let the rolls sit in a warm place for 1–2 more hours until they puff up again.
Baking Your Cinnamon Buns
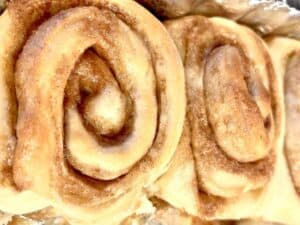
They will be golden brown and irresistible.
Preheat your oven to 350°F. Remove the wrap and bake the rolls for 25 minutes. They should be golden brown on top. The cinnamon will bubble up around the edges. Heaven.
Want Fresh Rolls in the Morning?
Make them the night before
If you’re prepping these the night before, don’t let them rise on the counter. Cover the pan with foil and pop it in the fridge right after cutting. The rolls will rise slowly overnight. Bake them the next morning straight from the fridge. Easy.
Top It Off with Cream Cheese Icing
Whip up a quick cream cheese icing if you want that sweet bakery finish. Just mix cream cheese, melted butter, a splash of warm milk, vanilla, and powdered sugar until smooth. Spread it on warm rolls.
The History of This Particular Made From Scratch Cinnamon Roll Recipe Using Yeast
My great-grandma passed this recipe down to my mom and she passed it down to me. It has been told that her mom, my great-great-grandma, is the one who started this recipe. I am curious as to just how old this recipe truly is and where it began. We have guesstimated that it is well over one hundred years old.
Family Recipe Variations
I love hearing about the different ways that my family members make these. Some use a teaspoonful of milk over the top of each roll before baking. Other members put syrup in the bottom of the pan before putting the rolls in it.
There are some that use white granulated sugar and others that use brown sugar. Rapid rise yeast is another variation that has sped up the process tremendously.

Recipe Steps: Shortened Version
Ingredients for Dough
- 2 cups warm water (no more than 110 degrees)
- 1 package rapid rise yeast
- 1 tsp. Salt
- 1/2 cup sugar
- 1/3 cup oil
- 4 1/2 cups bread flour
Ingredients for Filling
- ½ cup softened butter (1 stick)
- 1 ½ cup packed brown sugar
- 1 ½ tsp. cinnamon
Short Directions for Phase One
Combine water, yeast, and salt. Add sugar, oil, and then bread flour. Do NOT over mix. Cover with wax paper and leave it alone for about 2-3 hours. Knead dough for around 10 minutes, and make sure to sprinkle flour in as you go so it isn’t sticky. Let it rest for 10-20 minutes.
Short Directions for Phase Two
Sprinkle plenty of flour on the counter, and roll out dough into a large rectangular shape. Mix together the brown sugar, softened butter, and cinnamon.
Spread sugar mixture over dough and roll up dough. Use dental floss or a large sharp knife to cut individual rolls. You should be able to fill one 9×13 pan and one 8 x 8 size pan with this amount of dough.
Cover them with wax paper and let them rise for another one to two hours. Remove the wax paper and bake at 350 degrees for 25 minutes.
The inside may be gooey, so you will want to check them and extend the baking time in very short increments so that you don’t over bake them and dry them out.

Can I double the recipe?
Yes, you can double the ingredients for this recipe with no problems. You will need to use two 9×13 pans when it is time to bake them.

Approximate Schedule for Making Rolls for Breakfast
4:00 pm Mix up the dough and then let it rise.
6:00 pm Knead dough for 10 minutes.
6:10-6:30 pm Let dough rest. (10-20 minutes)
6:30 pm Roll out dough, spread sugar mixture over, roll up, and cut into individual rolls.
6:45 pm Cover rolls with foil and put into the fridge overnight.
6:30 am Preheat your oven to 350 degrees. Bake rolls at 350 degrees for 20-25 minutes.

How long will it take for me to make these?
These rolls are delicious and you and your friends and family will love them. Even if you are busy, you can make these. The hands-on time is only about 30-35 minutes. However, you will need to plan on being somewhat near the day you bake.
It will take you about 10 minutes to mix up the dough, another 10 to knead the dough, and around 10-15 minutes to roll out, spread on the sugar mixture, roll up, and cut them into individual rolls.
Rapid rise yeast has sped up the process tremendously. In the past, if I wanted any type of yeast roll or cinnamon roll by late afternoon, I would have to start them the day before. Not anymore.
Everything can be done in one day, depending on when you want to bake them. The waiting and dough rising time is much longer than the actual hands-on time, but it is worth the wait!
What do I do if they are still gooey in the middle when I take them out of the oven?
If they are still a dough like consistency in the middle, you will want to put them back into the oven. Bake them a minute at a time longer, and keep an eye on them. You didn’t do all that work and wait all that time for dried out rolls.
Remember, if they are just a teeny tiny bit gooey, they will continue to bake when you take them out of the oven, because the pan is still so hot. If they are just a bit gooey, but not doughlike, then you can probably take them out of the oven.

What about icing?
Of course! That is a great idea, and it just depends on your preference. I don’t usually add icing, because that is the way I grew up eating them. I have made icing for them before and it only adds to the deliciousness.

Time to be A Doer and Give These Cinnamon Buns a Try
There’s nothing quite like grandma cinnamon rolls. The smell, the taste, the memories. These are the kind of famous cinnamon rolls that people ask for every year. Trust me, they’re worth every minute. You don’t need fancy tools—just a large bowl, some cups of flour, and maybe a friend to lick the spoon.
Let me know if you try them. I want to hear all about your cinnamon roll adventures!

Anna Barbour
Hey there, my name is Anna, and I am so excited to share Keep It Simple Anna Sue with you. I am a wife, mother of two young men, and currently in a pre-empty nester season of life. God knew I needed blogging way before I did. Being a pre-empty nester has left me with…extra time. I decided to use that time for creativity and for helping others to see that if I can do it, they can do it too. Learn more about me.
Another winner! 😋
A few months ago, I attempted the yeast rolls. They were soooo good. I bookmarked this recipe and finally got the urge to try it. The cinnamon rolls are currently in the oven and they are looking amazing! Which means, they will be amazing!
Thanks for another winner and including how many hours to let the dough rest and rise. I have tried other recipes and the only instructions were to let double in size. Well, some of us are very impatient and need the time spelled out so that we can forget about it while completing other tasks.
Well, There goes the timer! Yum! Yum! Yum!
Oh my goodness! You have got me wanting some tonight. lol I hope they turn out great for you and I really appreciate the positive comment. Thank you for giving them a go and I hope they turn out great for you!